
How to Create Your CareNote Account: A Step-by-Step Guide

Welcome to our CareNote community! If you're new to CareNote and have been invited to join a team, this blog post is designed to help you set up your account and get started smoothly. Follow along with our video tutorial embedded below, or read through this step-by-step guide to creating your CareNote account.
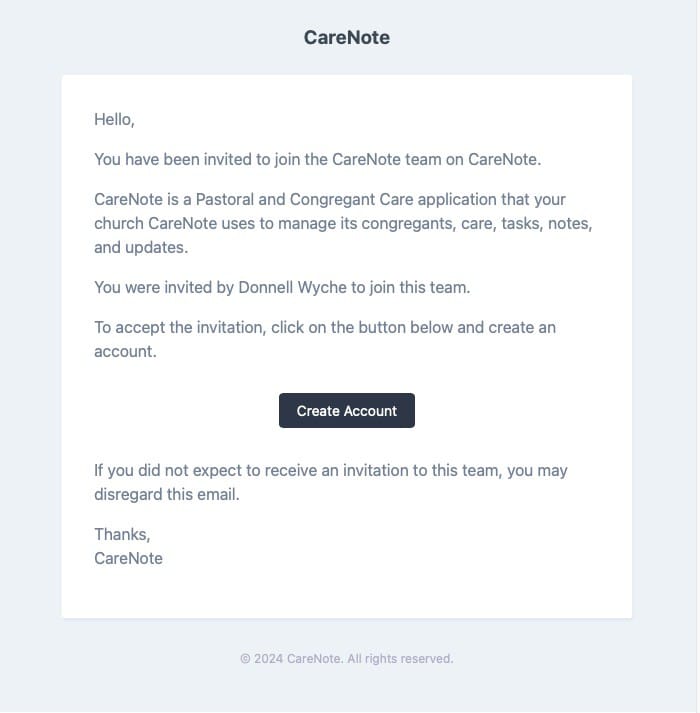
Step 1: Receive Your Invitation Email
When your church or organization invites you to join their CareNote team, you will receive an email from notifications at carenote.app. This email will include all the details you need, including who invited you and a link to accept the invitation.
Step 2: Accept the Invitation
Click on the link provided in your invitation email. You will be redirected to the invitation acceptance page on CareNote's website.
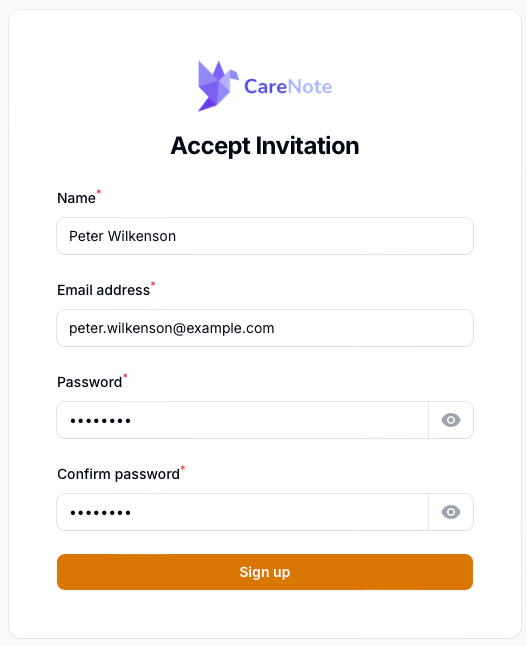
Step 3: Enter Your Details
On the invitation acceptance page, you will need to:
- Enter your name: Fill in your full name as you would like it to appear in CareNote.
- Create a password: If you prefer, you can use a password manager like 1Password or the suggested password by your browser (Safari, Chrome, etc.) to generate a strong password. Enter your chosen password in the provided field.
Step 4: Complete the Sign-Up
After entering your details, click the 'Sign Up' button. This action will save your username and password and automatically log you into CareNote, directing you to your dashboard.
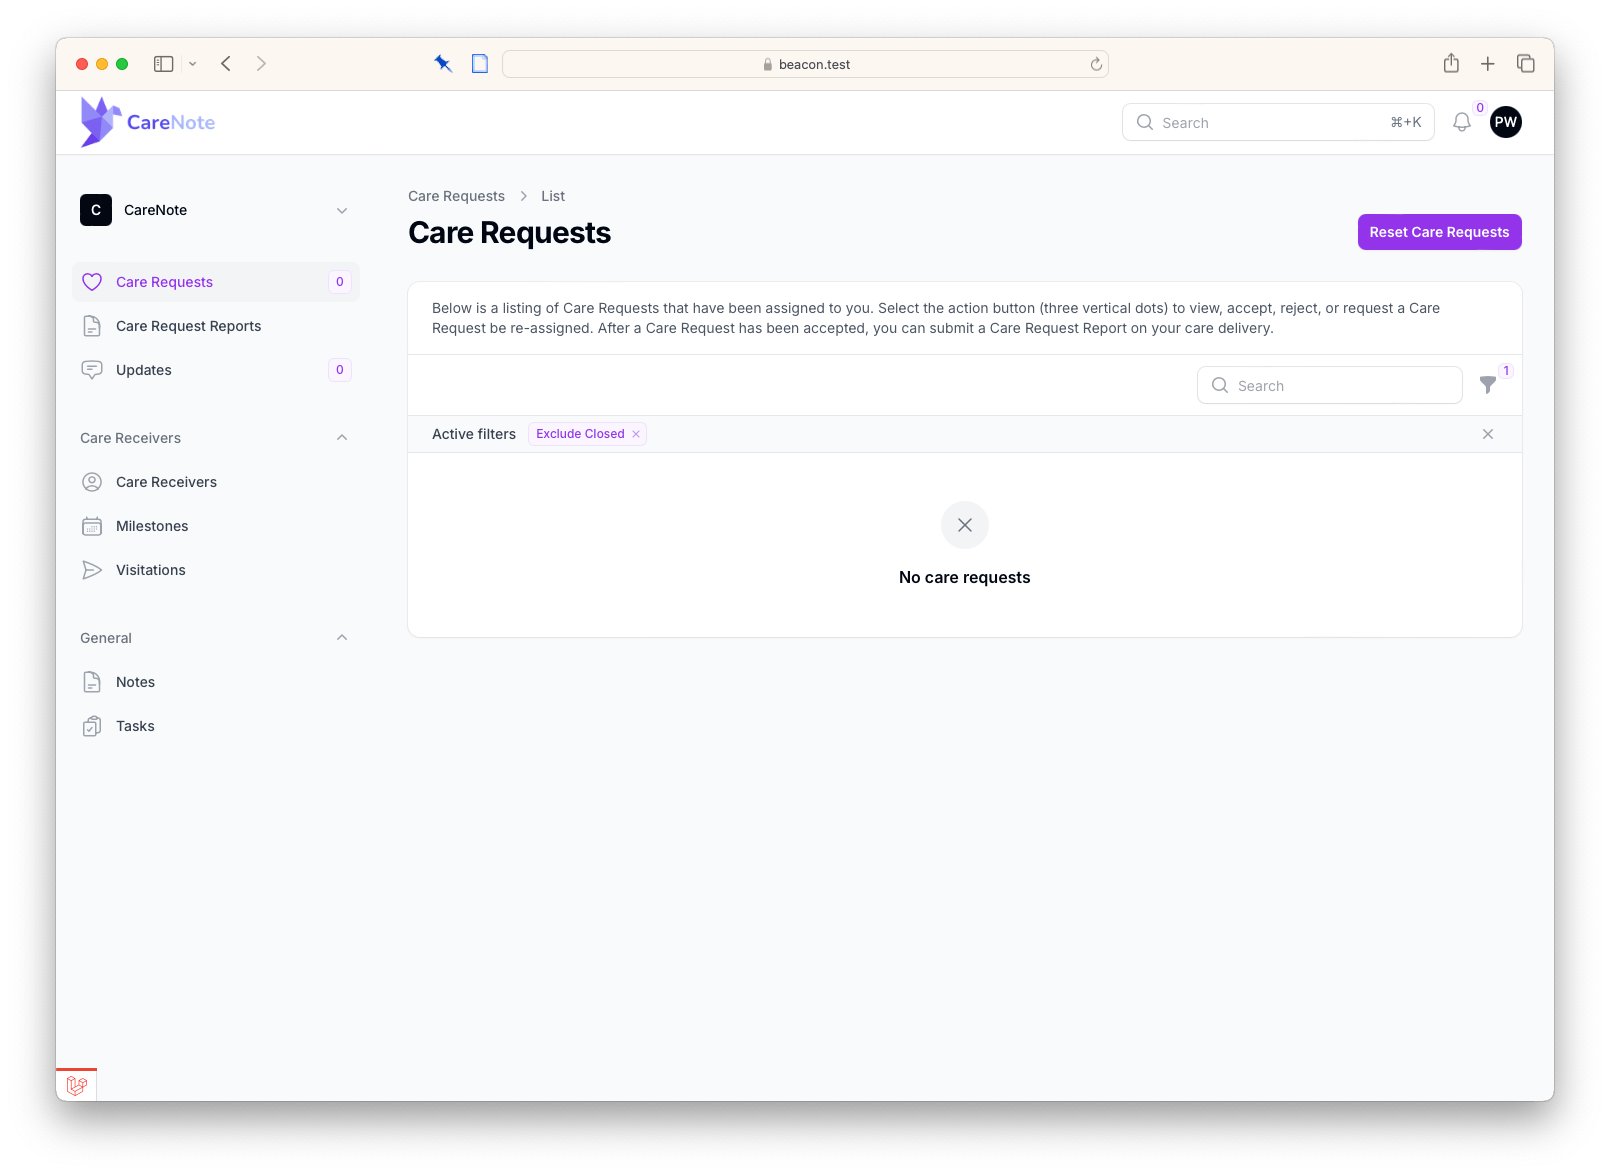
Step 5: Explore Your Dashboard
Your dashboard is your central hub for interacting with CareNote. Here’s what you can do:
- Add updates: Easily post new updates related to care receivers you interact with.
- Respond to care requests: View and respond to care requests assigned to you.
- Submit care reports: If you have been assigned care receivers, submit detailed reports on your interactions.
- Manage milestones and tasks: Add and track important milestones and tasks.
- Access reports: Review detailed reports available under your account.
This initial setup is just the beginning of your journey with CareNote. Your dashboard will be the primary interface for all your activities, helping you manage care efficiently and effectively.
Conclusion
Setting up your CareNote account is quick and straightforward. Once you're logged in, you'll find that CareNote offers a comprehensive suite of tools designed to enhance the way you manage and provide care. We hope this guide helps you get started without any hassle.
For any further assistance or questions, feel free to reach out to our support team. We're here to help you make the most out of your CareNote experience.